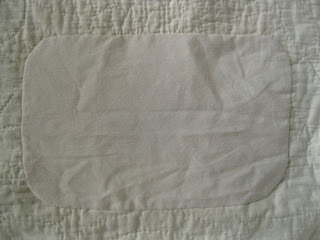
At some point, someone tried to iron the poor quilt! No one remembers when or how this happened. This is certainly not a good idea, but became even more troublesome when the iron left a pretty large scorch mark. The burned fabric on the front flaked away, and on the back the weakened fabric ripped. The batting in the area fell out.
The original batting, having been ironed, was pretty thin, so I made the replacement piece by tearing 100% cotton batting cross-wise. I started with a piece larger than the hole, and then pulled off little bits around the edge so there is a soft edge that blends in with the surrounding batt. I basted the new piece of batting in place.
The owner came up with a wonderful idea - she asked me to make the patch into a commemorative label. She told me what text she wanted, and we discussed different fonts and whether to embroider or use a fabric pen. I measured the shape of the scorched area, roughly sketched the patch in Illustrator, and experimented with text size and placement. Then I printed out the final version.
I transferred the text by taping the paper to a window, then taping on the repair fabric, and then tracing the text with pencil. The window becomes a big light box. I steady the fabric a tiny bit with my lefthand fingers on either side of the pencil to keep it steadier while I'm writing.
I basted on some fabric strips to make the patch fit in my embroidery hoop, and stitched the letters with sewing thread.
Appliquéing the patch was a little tricky, since it had to snuggle up to the snowflake appliqués, and keep the text centered and horizontal. I made several attempts at pinning/marking techniques, and procrastinated a lot until I got courageous enough to actually trim the patch and sew it on. I trimmed it as I went around instead of all at once, just in case I needed a little leeway fabric at some point.
Finally, I quilted the patch, but not through the embroidery, so it would be easier to read. I quilted a little bit from the back as well, to help keep the new batting in place.
This is a lovely pattern, and the quilt has such an unusually well-documented story. I loved being part of its tale.


My guess about the scorch mark is that someone used the poor quilt as an ironing pad - sad thought though that is!
ReplyDeleteGreat job! Non-quilters do not know the amount of time, precision, and love that go into a quilt. They are a thing of beauty (and function).
ReplyDeleteSo true, Lynn. And that's exactly why we love 'em so much, isn't it?
ReplyDeleteWow. You did an amazing job repairing this beautiful quilt. Thank you for sharing the process.
ReplyDeleteThanks, Nancy. The woman who now owns the quilt got so involved with the whole story about how it was made, and was so excited to learn so much about quilting. Very gratifying!
Delete