
***
Do you wish you knew more about repairing and caring for your quilts? There's another session of my Preserving Our Quilt Legacy virtual workshop coming up in a few weeks. Learn about techniques, supplies, fabric dating, etc., etc., and bring a quilt of your own for assessment for repair and future care. Full information on content and registration is on my website.
***
I recently did some minimal repair work on this lovely Improved 9-Patch quilt. Well, it was just a few small places, but there was lots of thought and several important decisions. It makes a good story of how my process works.
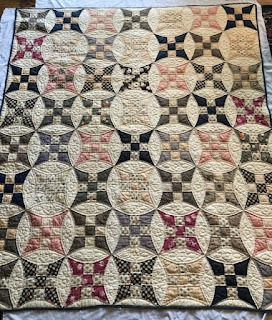
There were two pointy pieces that needed patching, and a few other places with some small tears.
Patching the Navy and White Dots
I had a small piece of a vintage white on navy polka dot. The dots were somewhat larger than in the original fabric, but I think the real mismatch was the unfaded color. Sometimes the reverse of a fabric can mimic fading, but in this case, it was still too dark.

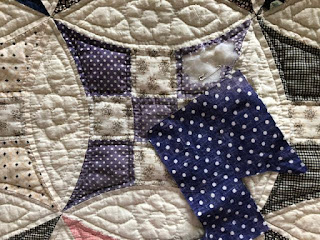

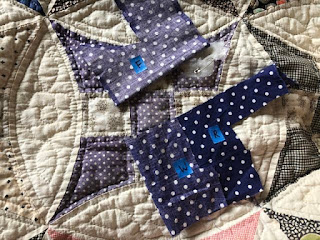
And.....the completed patch.
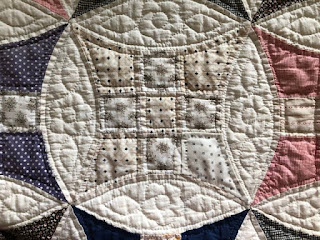
Patching the Tan, White, Black Print
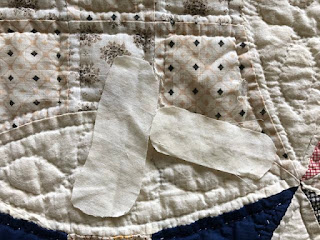
This pointy piece and the square next to it had some missing fabric on a corner, and at first I thought I could try to appliqué some small pieces of a solid cream fabric.
But, then I noticed some other tears elsewhere in the pointy piece, and realized I needed to do a complete patch. But I didn't have a fabric that was totally similar. I had a woodgrain print that picked up the tan grid on the original fabric very well. And I had a black on white print that picked up the little black diamonds on the original.
I cut a patch of each and studied the look under both artificial lighting and daylight and from a distance and close up. In the end, I decided that the rhythm of the black print was more important, and that from a distance, the woodgrain looked more like a solid tan and was too modern looking. Quite honestly, the way these look in the photos, I might have picked the woodgrain one. I guess it was really a six-of-one-half-dozen-of-the-other situation!
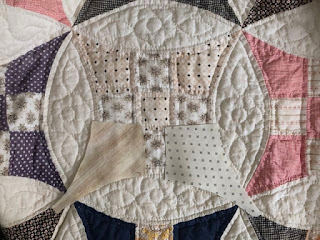
Here's the finished patch. I used one of those cream strips to patch the square next to the pointed patch.
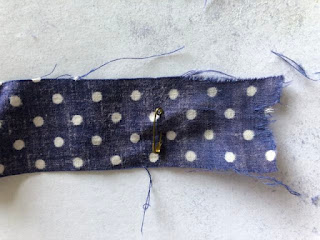
Closing Small Tears
These were truly small, an inch to inch and a quarter long. I closed them with herringbone stitch, having slipped a little new fabric into the slit to help support the stitching.
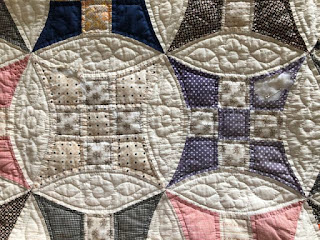
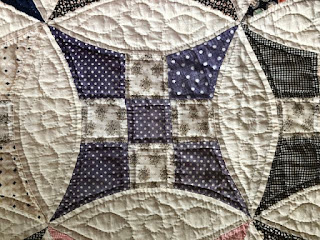
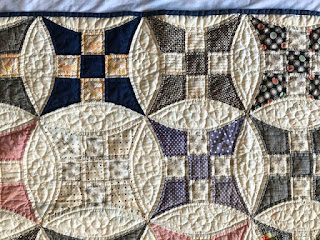
And finally: Here are some photos of the wonderful collection of fabrics in this quilt, starting off with the two patched blocks from further away.


Great repair and fabric choices. Unless it was pointed out I doubt any untrained eye would be able to tell or notice. What a wonderful quilt overall. Was the quilter known and is there an idea about the date? Was it all hand stitched?
ReplyDeleteThanks, Glennis! The quilter is not known. Ah, I forgot to talk about date. I think it's 1930s or maybe early '40s, with some fabrics from the 19-teens and '20s. I believe it was all hand stitched. I peered at the full-size photos and can't see anything that looks machined.
DeleteFabulous job, Ann, and thank you for sharing the sun fading trick. I've tried bleaching modern fabrics for use in vintage repairs, but results are so unpredictable. Sometimes the bleach doesn't just lighten the fabric, but changes the color from a turquoise to more of a green.
ReplyDeleteSun fading seems the best technique, but works better in August (like this job) than in January! I've taped fabric to my windows but that takes longer that outside. I've heard of people driving around with a piece of fabric on their dashboard to fade it. I've also heard of people running the fabric through the dishwasher several times, but haven't tried that yet. Yes, bleaching can be very unpredictable with colors! And also runs the risk, apparently no matter how much you wash it afterwards, of still carrying some bleach back to the quilt.
Delete