A Tale of Two Victorian Crazy Quilts - in Four Parts
Parr 1
Setting the Scene


This
pair of crazy quilts still lives in the family and the town where they
were made, with a descendant of the two quiltmakers.
They were
made circa 1890 in Brooklyn, Connecticut, by Emily Harris, and her
daughter, Eva May Harris. They are great-grandmother and grandmother to
the current owner. One of the quilts has a small piece of red fabric
embroidered with the name of Samuel Cady Harris, Emily's husband.

Both
quilts include bright yellow Special Constable ribbons and
commemorative ribbons celebrating the dedication in 1888 of the statue
of Gen. Israel Putnam. The town celebrates their native son as the
third in command of the Revolutionary Army.

Some
of the fabrics were in pretty bad shape or missing altogether. I
patched those, mostly with vintage silks, though none are as old as the
original silks. Some others were still mostly in place but quite
shattered. I stabilized those with couching stitches so as to keep as
much as possible of the original fabric visible. Each quilt had one
patch that was pretty badly damaged but too interesting to patch over. I
covered those with crepeline, a very sheer silk, to protect them.
(Here's one, and the other is in the next photo.)

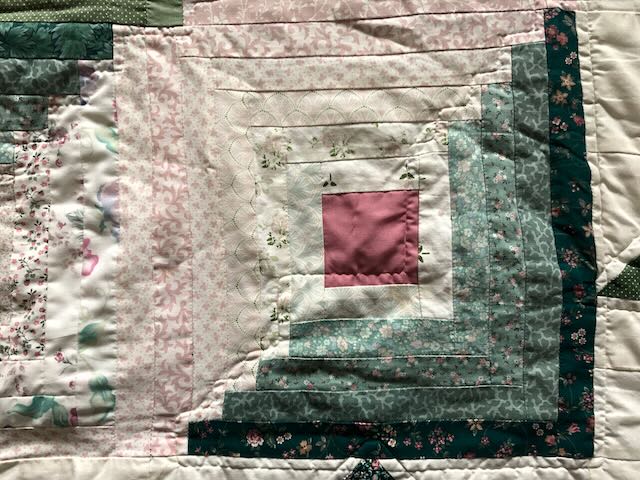
Here's a section that shows all the techniques that I used.

The plum arches over the fans were pretty well all torn. Here's one I patched.

A Tale of Two Victorian Crazy Quilts - in Four Parts
Part 2
What's Going on Here?But for me, beautiful and well-documented as these are, the project really got fun when I discovered what to me was an anomalous fabric and some curious earlier repairs.
Here's
the area in question. There are three pieces where the silks have
disintegrated to reveal a large piece of printed fabric, with colors
that are light and loud compared to the rest of the quilt.

Here are the observations and questions that had me really scratching my head:
1.
The colors seemed out of step with what I'm used to seeing in quilts of
the late 19th century, particularly the bright, deep orange and the sky
blue.
2. My first sense of the fabric was that it felt more
like what I remember of ladies' slinky, synthetic nightgowns of the
1960s. And the print style looked more like that era, too, not the
1890s.
3. Then I noticed the patches in that area have concentric
embroidered edges, one along the shattered silks on top and one along
the mystery fabric below them. And then I saw that the edge of the
mystery fabric extended around several intact silk pieces as well. The
entire area is about 10" x 13.5".


4. The mystery fabric was in much better shape than several of the silks that had been sewn on top of it.
5.
I peeked inside the torn spots on the mystery fabric, and saw the same
tan gingham that is used as a foundation fabric in other parts of the
quilt. None of the torn spots were large enough to get a glimpse of a
torn fabric that might have been lying between the mystery fabric and
the foundation.

But
what a mystery! Could someone have patched shattered 19th century
silks with a large piece of synthetic 20th century fabric, and then,
maybe someone else, re-patched that spot with some antique silks, some
of which disintegrated pretty quickly??
6. That's a weird enough
story, but consider this: the back and binding of the quilt are
intact. So if the mystery fabric was mending a large tear or other
disaster, it might be that all happened while it was a top, before
layering and finishing.
Here's the completed patching over the mystery fabric area.
There's another place where a similar routine happened - a patch disintegrating faster than the original fabric beneath it.

And
another piece where a painted fabric was apparently cut out and patched
with a plain silk, which then disintegrated totally. So now all we end
up seeing is the gingham foundation fabric.


A Tale of Two Victorian Crazy Quilts - in Four Parts
Part 3
ScienceSo, we decided to try to identify the mystery fabric with a burn test.

Here's
the set-up. There are some
threads of the mystery fabric (removed with the owner's approval), seen
just behind the candle. For comparison, I used swatches and
threads of known fabrics of silk, rayon, and synthetics. Tools are a
small
candle, tweezers for holding samples, a fire-proof work surface.
I recorded the testing with my friend Pam Goffinet watching and
helping
me with the commentary. (I thought I could fix the exposure problems
caused by the candle flame later, but found out I couldn't. I decided
to pull some stills and fix them as best I could. Next time I do this,
I'll be better prepared and hopefully get a better video... )
The
technique is to move a swatch slowly into the flame, and take note of
things like: how easily does it start to burn, does is burn quickly or
slowly, does it have an odor and what is it like, what kind of residue
is left when it goes out, and so on. There are lots of sites online
that give guidelines of what to look for on these kinds of topics.


I
also tried a new technique I had recently read about - fiber testing
with bleach. It seems that bleach destroys protein (animal) fiber and
not cellulose (plant) fiber.
Here is a silk swatch on the left and a rayon swatch on the right.

Pretty
quickly, things started to happen. It looks like color is coming out
of both. What you're actually seeing on the silk (left) is a mass of
teeny bubbles. Pam and I decided that was evidence of a chemical
reaction between the silk and the bleach. What you see on the right is
color loss, first turning blue and then losing that color as well, not a
single bubble.

And finally, there's very disintegrated (and paler) silk on the left and a fully intact and basically strong rayon on the right.

And then came the actual testing of the fibers from the mystery fabric.
The results: Both burn and bleach tests are quite clear that the mystery fabric is silk, not an early synthetic or rayon.
The
fibers did not burn easily and once removed from the flame, went right
out. What you see hovering over the fibers here is smoke, not flame.
It had a dark ash, soft not hard.
The
silk fibers in bleach (next to tweezers in top photo, next to my finger
in next photo) did make tiny bubbles and then disappeared.
I
posted my questions on a couple of Facebook groups, and got an answer
from my friend Martha Spark, who said she's seen late 19th century
silks that have these colors. And then I finally remembered that silk
and wool, i.e. animal fibers, take dye much more easily than plant
fibers like cotton - and therefore a silk or a wool can often sport
colors that were more difficult to dye on cottons.
Here's one little piece of the mystery fabric that was used as a tiny,
original piece. I'm glad for that, so that there is some visible
still. And here, next to some orange embroidery threads, the color doesn't look
out of place....

So all that means the patching could all have been done around the time the quilt was made.
But
I still can't quite come up with a story I like - why was there such an
light colored print put on such a large area of a generally dark set
of fabrics, and then covered with fabrics similar to the rest of the
quilt, some of which disintegrated faster than what they were patching?
Maybe a temporary patch until better silks were found?
A Tale of Two Victorian Crazy Quilts - in Four Parts
Part 4
Just Enjoy the BeautyBut anyway, mysterious mending aside, these quilts have loads of gorgeous and interesting fabrics and some fun embroidery.
I
love these stripes. I can totally imagine a gorgeous gown made of
either one. Statement outfits, for sure. I really like the more
subdued brocade on the left as well. The gingham check is silk.
Interestingly, the black has survived as well as the grey. The little
squares between the check are nearly all gone - what you're seeing is a
muslin underneath. Those little squares were originally white, as you
can see at the top pointed corner where a few are still intact.

A rich, cut velvet stripe.

Here's a grouping of several tiny patches made from woven plaids and stripes. Exquisite!

A great embroidered rooster and also a shamrock stripe.

The
center fan block on this quilt has miniature fans in the corners. The
fans on these quilts are all notable for their very skinny spokes.

Hand painted flowers and a soft floral print, looking like watercolor painting.
One quilt is backed in this paisley, with a gentle woven ribbing. The other is backed with wavy lines.


.......And
that's the end of the tale! The quilts are back home. The fabric
mystery is solved, but the story line remains a mystery!

.jpeg)
.jpeg)


.jpeg)


.jpeg)


